FORMATS
 |
Graphic Workshop works primarily with bitmapped image files. This is as opposed to vector or line art files. Vector files include EPS, DXF, GEM, Harvard Graphics, and Lotus PIC files, among others. In most cases, the specifications for image files are pretty standardized and Graphic Workshop will reliably import image files in its supported formats without difficulty. There are a few exceptions to this, as will be discussed in detail throughout this document. Each of the formats listed here also includes the maximum number of bits of colour the format will support. You can work out the number of colours this represents as two to the power of the number of bits. Hence, an eight-bit file has 28 possible colours, or 256. 24-bit files have essentially an infinite number of possible colours – 16,777,216 colours, which is near enough to infinity for a computer. Some of the file formats supported by Graphic Workshop have various write options. The more commonly used ones can be configured through Setup. A few of the really esoteric ones will require that you edit the GWSPRO.INI file. See the Configuration document for more about this. Working with graphic file formats can have qualities similar to those of juggling live polecats in a darkened room during an earthquake. While supposedly standardized, in practice numerous variations and genuinely "illegal" file types appear from time to time. If you encounter files which Graphic Workshop purports to read but in fact doesn't seem to be able to deal with, we ask that do the following:
Try not to drop any of the polecats – they're easily offended.
The ART format uses a proprietary compression structure created by Johnson-Grace. As of this writing, ART technology is owned by America On Line. Many files downloaded from AOL are stored in the ART format. As an aside, a not-insubstantial number of files having the extension JPG are really ART files inside. If you have trouble reading a downloaded JPEG file, try renaming it with the extension ART. ART files support file comments – see the discussion of file comments in the Configuration document. The ART format uses lossy compression to create smaller files – there's a more detailed discussion of lossy compression elsewhere in this document as it pertains to JPEG files. The JPEG/ART Quality item in Setup will define the degree of compression of ART files written by Graphic Workshop. As of this writing, Graphic Workshop only supports ART files having one image per file. Note that ART file comments are limited to 200 characters. If attempt to add a comment longer than this to an ART file, the extra characters will be ignored. There's a second extant format which uses the extension ART – it was used to create graphics for the PFS:First Publisher application some years back. It only supports monochrome images. Graphic Workshop will read uncompressed PFS:First Publisher ART files if it encounters them – it always writes Johnson-Grace ART files.
AVI files contain Video for Windows animation. They can have any dimensions, although they tend to be fairly small. Graphic Workshop will allow you to read individual frames from an AVI file, display the whole file as an animation sequence and convert other selected animated formats to AVI. If you will be converting from AVI to MOV, please be sure to read the section of this document that deals with MOV files. When Graphic Workshop creates an AVI file, as when it's translating from another animation format, it will set the movie quality factor according to the value of the Movie Quality Factor control in Setup. This number can range from 100 for unspeakably bad quality to 10000 for perfect quality. The default is 6500, which allows for some image degradation. If you increase the quality factor your AVI files will look better but they'll get much bigger. Note that Graphic Workshop will not convert between animated GIF files and AVI files. See our GIF Construction Set software for this functionality. You must have the Video for Windows drivers installed for the AVI functions to work properly. These are typically installed as part of Windows 95, 98 and NT 4.0. If the AVI functions don't work, you have driver problems. Graphic Workshop can play files in this format using either the default Windows application associated with this file type, or through its internal player. See the Display tab of the Setup dialog for more information.
The BGA format is used by some OS/2 Warp applications. It can contain multiple images and is actually a variation on the OS/2 BMP format. If you attempt to read a BGA file which contains multiple images, a dialog will appear to allow you to select the image you're interested in. Converting an image to the BGA format will result in a single-image BGA file.
BMP files are used as wallpaper under Windows. They can be created using the Paintbrush application supplied with Windows, among other things. The BMP and DIB formats are identical – DIB files are used in some programming and multimedia applications. Note that the OS/2 also supports graphic files with the extension BMP. These are distinct from Windows BMP files. Graphic Workshop will read both types. You can configure it to write either type by setting the Write OS/2 Bitmaps switch in Setup This format supports alpha channels.
CALS (CALS Raster) – Maximum bits: 1 The CALS format is used by various government agencies to store documents. It only supports two-colour images, and they're usually fairly large. Graphic Workshop will read CALS files and convert them to other formats, but it will not write to the CALS format. As of this writing, Graphic Workshop's CALS support has been tested for Type 1 CALS files only. CALS files to be read by Graphic Workshop must have the extension CAL or CALS.
CAM (Casio Digital Camera) – Maximum bits: 24 These files are created by Casio's digital cameras. Graphic Workshop will read them and convert them to other formats, but it will not write to the CAM format.
Graphic Workshop's use of CDR files is a bit peculiar. You'll save yourself a degree of frustration if you read this section before working with CDR files. Note that there are two distinct modes under which Graphic Workshop can read CDR files. Corel Draw's CDR files are vector graphics, but they contain small preview or thumbnail images which appear in the Corel Draw File Open dialog and in the Mosaic browser application. Graphic Workshop will read these preview images – it will not read the actual line art graphics in CDR files. The preview images are very coarse, but they're useful for quickly ascertaining what's in a CDR file. Alternately, Graphic Workshop can be instructed to search CDR files created with Corel Draw 4 and 5 for bitmap objects. If one or more bitmaps are found, Graphic Workshop will read these as if they were conventional bitmap images. This is handy, for example, should you wish to extract a bitmap from a CDR file with no loss of resolution. If no bitmaps are present, Graphic Workshop will show you the CDR thumbnail preview for the file. If more than one bitmap is present, a dialog will appear to prompt you to choose one of the available images Enable the Read CDR Bitmaps switch in Setup to have Graphic Workshop troll CDR files for bitmaps, or disable it to have it display thumbnails for all CDR files. If Graphic Workshop only reads a thumbnail image from your CDR files, it will allow you to convert from CDR, but you'll be converting the preview images. This will not be attractive. Should you contact us and ask us why converting from CDR thumbnail images results in a small, coarse graphic that's nowhere near as good as it looks in Corel Draw, our leather winged demon of the night will make a special trip over to visit you and rip out your lungs. You can convert other formats to CDR with Graphic Workshop. The resulting file will be a version four CDR file with one bitmap object in the center of Corel Draw's workspace when you open the file in Corel Draw. CDR files created by Graphic Workshop are readable with Corel Draw 4.0 and beyond. They will not open in Corel Draw 3.0. By default, images converted to CDR will appear as if they were sized to print at 150 dots per inch. You can change this by adjusting the value of the CDRSize item in GWSPRO.INI Note that the CDR format is proprietary to Corel Systems, which has thus far not disclosed its workings. Nor have they undertaken to keep it consistent over future releases of Corel Draw. Graphic Workshop can deal with CDR files from Corel Draw 4.0 and 5.0. CDR files support file comments – see the discussion of file comments in the Configuration document.
The CUT format is exceedingly awkward, and Graphic Workshop makes a few assumptions about how CUT files will be used in order to make it workable. To begin with, CUT files don't know how many colours they have in them. They rely on a second file, called a PAL file, to define their colours. Graphic Workshop looks for a PAL file to decide whether a CUT file has two bits or eight bits of colour. If it doesn't find a PAL file with the same name as your CUT file, it will assume that the CUT file in question only has two bits of colour. Otherwise, it will assume that there are 256 colours in the file. Files written to the CUT format from Graphic Workshop will appear as two-colour files if they started out that way or as 256-colour files if they had more than two colours initially.
The DCX format is used to store FAX documents. DCX files can include multiple pages. If you attempt to view or process a multiple-page DCX file, a dialog will appear to prompt you for the page to read. Graphics converted to DCX will be written to single-page files. Note that only monochrome graphics can be converted to the DCX format.
The EMF format contains vector graphics. Graphic Workshop will rasterize EMF files into bitmaps. You can set the colour depth of the rasterized bitmaps this feature will create using the Vector Read Options control in Setup. Set the Configuration document for more about this. Note that the image dimensions set by the Vector Read Options control are ignored by EMF files. Graphic Workshop will not write to the EMF format. When you read an EMF file with Graphic Workshop, the result will be a bitmap.
EPS (preview only) – Maximum bits: 24 EPS files – encapsulated PostScript – can optionally include TIFF images glued to the end of their PostScript code. These TIFF images server as preview graphics for applications which can import EPS files into documents, but not interpret them. Graphic Workshop will display EPS preview images only – it will not interpret PostScript. If no image is present in the EPS file you attempt to view or process an EPS file, Graphic Workshop will tell you that no bitmap could be found. Converting from EPS to another format will produce a coarse preview image only. Note that the EPS option is initially disabled when Graphic Workshop is installed. If you wish to use this function you need to enable it in the Formats dialog.
EXE (self-displaying pictures) – Maximum bits: 8 You can convert images having between two and 256 colours to files with the extension EXE. Such files are self displaying pictures. For example, if you have a file called PICTURE.GIF and you use Graphic Workshop to translate it to PICTURE.EXE, typing PICTURE from the command line will cause the picture to display on your screen. Note that Graphic Workshop installs with the EXE format initially disabled. You must enable it in the Formats dialog from the File menu before Graphic Workshop will read or create EXE pictures. The EXE pictures created by Graphic Workshop for Windows can be either DOS or Windows applications. You can define which type of picture to create with the Windows EXE Pictures switch in Setup. Pictures written into the EXE format can subsequently be read back into any other format. However, note that Graphic Workshop can only read EXE files which it has created. Use the Get Info function to check out EXE files if you aren't sure whether they're pictures or programs. Graphic Workshop will not read self displaying pictures written by other applications. Windows EXE Multimedia Pictures If you have Graphic Workshop create EXE pictures with the Windows EXE Pictures option of Setup enabled, the resulting EXE files will be stand-alone Windows applications. Click on the icon for one and your picture will appear in a window. Double click on the system menu close it. Using the Setup function of Graphic Workshop, you can enable a number of advanced features of the Windows EXE pictures created by Graphic Workshop. This function is discussed in the Reference document. DOS EXE Pictures In order for a DOS EXE picture to display, the system which you attempt to run it on must have a video card which supports enough colours to show the picture. Specifically, you will need a VGA card to display an EXE picture with 256 colours, at least an EGA card to display one with 16 colours and so on. EXE picture files support CGA, EGA, VGA, super VGA and Hercules cards in autodetect mode. Pictures displayed by converting them to EXE files and running them can't be panned around, even if they're larger than your screen. Hitting any key will return you to DOS. You can create EXE picture files either compressed or uncompressed as defined by Create Compressed EXE Files in Setup. Uncompressed files display quickly but take up a lot of disk space. Compressed files usually occupy less space but display a bit slower. Note that especially in complex scanned or dithered images, you might find that compression actually results in a larger file than leaving an image uncompressed. An EXE picture created by Graphic Workshop will attempt to autodetect the display card type in the machine it's run on. Some cards are sufficiently weird that this isn't always possible. To get around this, you can run EXE pictures with display card command line overrides. These are the command line switches an EXE picture will accept:
The command line switches assume that you're using DOS 3.0 or better. You must have a space between each switch if you're using more than one of them. In its standard VGA or autodetection modes, an EXE picture will only display 256 colours at 320 by 200 pixels. If it's running in a super VGA mode, your picture will display in 640 by 480 pixels at 256 colours. This assumes that you select the appropriate switch, that your card has at least 512 kilobytes of memory in board and that your monitor will sync at this resolution. Note that when you hit a key to end the display of a picture, the ASCII code of the key will be returned as a DOS error level, which can be trapped in a batch file. If your picture terminates because of the /Wnn switch instead, the error level will be zero. If you run an EXE picture with a question mark as its command line argument, it will display a list of its command line switches. You can use the /DIS, /Wnn, /KEY and /FAD switches to create slide shows and interactive displays. Use a batch file to set up the pictures you want to work with. The /DIS switch will make the transition between images clean – just make sure you omit it from the last image you display. Here's a typical batch file:
ECHO OFF
Note that if you use the /W00 switch, your image will return immediately to DOS or to whatever application spawned it. This is useful, for example, should you want to use an EXE picture to display an image and then have the program that called it further modify the screen contents.
FIF files are created by software from Iterated Systems' fractal compression technology. They can be thought of as being similar in nature to JPEG files, in that fractal compression deletes some of the detail from a compressed image in order to achieve better compression. The visible nature of the image degradation of FIF files will vary somewhat from that of JPEG files. Graphic Workshop is only able to read FIF files – due to licensing restrictions by Iterated Systems, it will not convert files from other formats to FIF. As with JPEG files, you can tell Graphic Workshop to treat FIF files as being either eight- or 24-bit entities. The Read JPEG/FIF as RGB switch in Setup defines this – turn it on for 24-bit reading. Reading a FIF file with this switch off will cause it to be dithered to 256 colours. By default, Graphic Workshop reads FIF files using internal buffers, which is fast but memory hungry. As FIF files don't usually contain really huge images, this is fairly safe. If you encounter a FIF file that won't read because of memory problems, disable Fast FIF Read in Setup. Note that this switch is ignored if Read JPEG/FIF as RGB is disabled.
The FITS format is used to store images from telescopes and other astronomical sources. Graphic Workshop supports a subset of FITS. Specifically, it will only handle images with two axis correctly. FITS files can contain more than eight bits of grey scale information, but as no PC display hardware exists that can display it, images with higher resolution will be reduced to eight bits of grey for display and conversion. It won't take you much work to find FITS files that Graphic Workshop will not display. FITS files are often used to contain images which aren't simple two-dimensional flat graphics. If you write an image to a FITS file, it will be stored as an eight-bit grey scale picture.
The FLI and FLC formats are a DOS-based animation protocol developed by AutoDesk. All FLI files are constrained to have the dimensions 320 by 200 with eight bits of colour, and most FLC files do as well. At present the FLI and FLC formats do not support sound. The FLI and FLC formats use simple run length compression. Note that complex frames which don't compress well can result in really huge FLI or FLC files. The raw data for a 100-frame FLI file would require over six megabytes of storage.
FPX (FlashPix) – Maximum bits: 24 The ultimate in flexible image file formats or the graphic standard from hell – we favour the latter – FlashPix is designed for photorealistic imaging and specifically for the manipulation of pictures from digital cameras. Graphic Workshop will view FlashPix images and convert them to other formats. It will not convert images to the FlashPix format as of this writing, pending the resolution of some problems with the FlashPix libraries. FlashPix files often include multiple resolutions of the same image. This is similar to the way Kodak Photo-CD files are stored, save that the smaller versions are simply scaled from the larger ones. As there's no real use in accessing these smaller resolution images – Graphic Workshop offers you much more flexible sizing options in its Scale function – Graphic Workshop ignores them.
These can range from monochrome to 256-colour images in any size you can find them. Graphic Workshop supports both the 87a and 89a versions of the GIF standard The Details function of the Get Info dialog will display the entire structure of a GIF file. Many GIF files contain text information, such as comment blocks, along with their images. The GIF format supports image comments, as discussed elsewhere in the Graphic Workshop documentation. You must enable the Write File Comments and Create GIF 89a Files options in Setup to include comments. In order to view GIF files having more than one image, or to view animated GIF files in real time, the Multiple Image GIF Files item in Setup must be enabled. Note that this may increase the access time for some GIF files. GIF files can be created using either interlaced or non-interlaced storage. An interlaced GIF file has its lines stored in a non-linear order. This will in no way affect how your GIF files will look in Graphic Workshop – they'll appear in interlaced order if they're displayed in a web browser. To have Graphic Workshop write interlaced GIF files, select the Write GIF Interlaced option in Setup. By default, if you attempt to view an animated GIF file, Graphic Workshop will display it as such. It can alternately be configured to prompt you to select which of its discrete images you'd like to look at. If you don't want to have it automatically view animated GIF files, turn on Prompt to View Animation in Setup.
GEM/IMG is a fairly ancient format, and you probably won't want to bother with it unless you like old versions of Ventura Publisher. There are actually quite a few variations on IMG files – they handle monochrome and grey level images. Graphic Workshop supports files with up to 256 levels of grey and 24-bit IMG files with up to sixteen-million colours. Note that 24-bit IMG files are only supported by Ventura 4.0 and better.
HRZ (Slow Scan Television) – Maximum bits: 24 Images in the HRZ format always have 24 bits of colour and the fixed dimensions 256 by 240 pixels. Images with differing dimensions will be padded or cropped to fit in this space when they're translated to HRZ. Images with fewer colours will be promoted to 24 bits. This is a fairly specialized format – if you aren't using slow scan television, you probably don't need it. You might well ask what slow scan television is – damned if we know. Conventional television seems slow enough. Graphic Workshop only reads uncompressed HRZ files.
ICO files (Windows icons) – Maximum bits: 24 ICO files are used to contain Windows icons. They're very small bitmaps. If you convert a larger bitmap to ICO, only the upper left corner of the source image will appear in your icon. Investigate the Graphic Workshop Scale and Crop modes if you're creating icons. You might also have recourse to the Effects Colour Reduction function if your source images have too many colours. ICO files consist of a bitmap and a transparency mask. When you view an ICO file with Graphic Workshop, the transparent colours will be replaced with a solid colour – by default it will be grey. You can change this colour by editing GWSPRO.INI and changing the value of the IconTransparentColour item. Graphic Workshop will read icons of any size and colour depth recognized by Microsoft Windows. It will only write sixteen by sixteen pixel or 32 by 32 pixel, sixteen- or 256-colour icons. The size of the icons it creates can be set using the Write 16 by 16 ICO File switch in the Setup dialog. Icons written with the Write 16 by 16 ICO File option enabled can be used as favicon.ico for your web pages. Create a sixteen-colour, sixteen by sixteen pixel icon of this name and place it in the same directory as the index.html file on your web server. If someone adds a bookmark for your web page using Internet Explorer, your icon will appear in the Favorites menu of the browser in question.
IFF/LBM/HAM – Maximum bits: 24 IFF files originated with the Amiga. The IFF file standard is extremely flexible and it supports all sorts of things besides storing images. IFF files are found in PC environments PC having been ported from Amiga systems. They are also created on the PC by several applications such as Electronic Arts' Deluxe Paint – in this case they may have the extension LBM. Graphic Workshop also reads Amiga HAM files. Note that there are a number of proprietary variations on the IFF format which Graphic Workshop cannot read.
JPG (Joint Picture Experts Group) – Maximum bits: 24 The JPEG format is actually a combination of several elements, and it's important that you understand what it does before you use it. The JPEG algorithm reduces the amount of space a compressed image will occupy on disk by selectively removing details from the image. Pictures with fewer details compress more effectively. The amount of detail removal is defined by the JPEG/ART Quality item in Setup. At the default value of 75, relatively little picture degradation will take place but a significant amount of compression will be obtained. At lower values you'll experience still better compression, but with a marked loss of image quality. Once an image has been converted to JPEG, its lost details are lost for good. Note also that repeatedly reading and writing the same image in the JPG format will successively degrade it – it's a very bad idea to convert from JPG to JPG, as your pictures will get a bit uglier each time you do so.
The best way to convert from JPEG to a 256-colour format, such as GIF, is to enable the Read JPEG as RGB switch in Setup and then use the Colour Reduction option of Effects. Graphic Workshop includes support for progressive JPEG. A progressive JPEG file will initially appear blurred if it's part of a web page or other on-line service, and will resolve as more of the file is transmitted. Graphic Workshop will read and write progressive JPEG file but it will not display them progressively – that is, if you view progressive JPEG file, it will appear as a single sharp image. You can determine whether Graphic Workshop writes conventional or progressive JPEG files through the Write Progressive JPEG switch in Setup. Note that many applications with JPEG support will not read progressive JPEG files. Graphic Workshop will read the primary images from JPEG files with Exif extensions. When Graphic Workshop writes a JPEG file, it can store your choice of image resolution values in the file. See the discussion of file resolution in the section of this document which deals with TIF files. You'll need to enable Write JPEG Resolution in Setup to have it do this. Graphic Workshop can read and write JPEG files using your choice of two JPEG libraries – the Pegasus and IJG JPEG functions. The amazingly fast Pegasus library reads JPEG files much more rapidly than most other applications can, but it does so by storing your entire image in memory. For conventional JPEG files – which are usually pretty modest in size – and the sort of hardware Graphic Workshop Professional needs to run, the Pegasus JPEG libraries will avail you of unsurpassed speed. Should you have Graphic Workshop attempt to read a JPEG file which cannot be handled in memory, such that its attempt to use the Pegasus library fails, it will automatically try again with the traditional IJG JPEG library The IJG library does not require that your entire graphic fit in memory at once. For practical purposes, this will only happen if you attempt to work with really enormous JPEG files, or if you run Graphic Workshop with very restricted available memory. There is a slight speed penalty involved in having Graphic Workshop try the Pegasus library, discover that it lacks sufficient memory and then try again with the IJG library. If you frequently work with either very large JPEG files or with very little available memory, you can disable the Pegasus library by turning off the Pegasus JPEG switch in Setup. Note that Graphic Workshop will not use the Pegasus JPEG library if you have the Read JPEG/FIF as RGB switch in Setup turned off. All graphics written to the JPEG format are handled through the IJG JPEG library. The Pegasus JPEG library is a product of Pegasus Imaging Corporation, and is available for a wide range of imaging applications. You can learn more about the Pegasus JPEG library and other imaging development tools by visiting Pegasus at their web page.
KDC (Kodak Digital Science) – Maximum bits: 24 KDC files are created by Kodak's digital cameras. Graphic Workshop will read them files and convert them to other formats, but it will not write to the KDC format. Graphic Workshop will read KDC files created by Kodak DC30, DC40, DC50 and DC120 cameras, but not DC20 cameras. If you need to read DC20 KDC files, see the sixteen-bit version of Graphic Workshop classic. More recent Kodak digital cameras save their images in the FlashPix format, discussed elsewhere in this document.
KQP (Konica Quality Photos) – Maximum bits: 24 The KQP extension is used by Konica for their digital photofinishing services. KQP files are in fact Pegasus PIC files, as discussed elsewhere in this document.
MAC (MacPaint) – Maximum bits: 1 MacPaint files come in two flavours. The most common one is straight ported MacPaint files, that is, files having a "MacBinary" header. The other is "headerless" files, having no MacBinary header. Graphic Workshop reads both types, but if you convert a file from a different format to MacPaint format the file will be written in accordance with the setting of the MacBinary Header item in Setup. Files converted to the MacPaint format from other formats will be cropped or padded out as necessary to fit in the MacPaint format's 576 by 720 format. Only monochrome files can be converted to MacPaint, as MacPaint in a monochrome-only format.
MIDI files aren't graphics – they're sequenced music. None the less, you can browse them with Graphic Workshop. If you "view" one, a small bitmap will appear and the music in the file will play. Note that the Play item in the Picture menu of View mode can be used to repeat a MIDI file once it finishes. If you attempt to convert a MIDI file to a graphic format, the resulting graphic file will contain a copy of the MIDI bitmap that appears in View mode. MIDI files display in Graphic Workshop's browser windows with a canned thumbnail. You must have the MCI sequenced music drivers installed for the MIDI functions to work properly. These are typically installed as part of Windows 95, 98, 2000 and NT 4.0. If the MIDI functions don't work, you have driver problems. Graphic Workshop can play files in this format using either the default Windows application associated with this file type, or through its internal player. See the Display tab of the Setup dialog for more information.
MOV (Apple QuickTime) – Maximum bits: 24 MOV is Apple's digital video format, analogous to the AVI format commonly used under Windows. In addition to its use on Apple Macintosh computers, MOV is useful on Windows systems, as Apple has released a QuickTime driver set for Windows. Many OEM Windows systems come with QuickTime pre-installed. You'll find a lot of commercial downloadable film trailers and video clips available in the MOV format. Well you might ask why so many people are happy to spend twenty minutes downloading half a minute of video of The Simpsons when they wouldn't actually watch the show itself at gunpoint. Note: you must have QuickTime 5.0 or better installed in your system to use the MOV functionality in Graphic Workshop. You can ascertain whether QuickTime is available by opening the Settings submenu of the Windows Start menu and selecting Control Panel. If QuickTime is installed, a Control Panel applet icon like this one will be visible.
Double-click on this icon to ascertain the version number of your installed copy of QuickTime. Graphic Workshop may behave erratically or crash if you attempt to read, write or get information about MOV files with a version of QuickTime earlier than 5.0 installed on your system. You can download QuickTime from Apple's web page – as of this writing, it's available at no cost. See http://www.apple.com/quicktime/download/index.html. It's a very good idea to uninstall previous versions of QuickTime before you install the current version. Here's something else to be aware of. For reasons which are too complex to discuss in polite company, waking up anything that uses QuickTime involves Windows loading a lot of QuickTime's components from your hard drive. As such, you'll experience a wait of a few seconds wherever you ask to view or convert an MOV file with Graphic Workshop. This is normal. QuickTime MOV files typically contain digitized video, or movie clips, with one track of video and one corresponding track of audio. It's worth keeping in mind that the QuickTime specification actually allows for QuickTime movies to have multiple video and audio tracks, although this feature is rarely used. Graphic Workshop will only access the first video and audio track an MOV file. If you double-click on an MOV file in a Graphic Workshop browser, a window will open and it will begin playing. The Graphic Workshop Get Info function includes a Details section for MOV files. This displays the atom structure of a QuickTime movie. You will probably need recourse to Apple's QuickTime documentation to correctly interpret this. You can convert between QuickTime MOV and Video for Windows AVI files with Graphic Workshop. There are a few catches to this process – it's a good idea to acquaint yourself with them before you start converting files.
In rare cases, you might encounter MOV files which refuse to convert, or which convert with video aberrations, distorted sound or no sound at all. These problems are usually caused by one of two issues inherent in QuickTime.
Neither of these situations can be corrected in software per se – you would have to contact the author of the MOV files that are misbehaving and have them rebuilt using more conventional structures. By default, movies written to the QuickTime format with the Write Compressed Movies option enabled will be written using the Cinepak codec. If you don't know what a codec is, consider yourself fortunate and just ignore this observation. If you have cause to change this, you can do so by editing GWSPRO.INI. Note that the process of converting between video formats is, by its nature, a bit imprecise. The available video formats have differing capabilities, and as such reproducing a movie from one format in a different format often entails that Graphic Workshop fudge a few details behind your back. Graphic Workshop can play files in this format using either the default Windows application associated with this file type, or through its internal player. See the Display tab of the Setup dialog for more information.
MP3 files are not graphics – they're sampled sound. Graphic Workshop Professional will play MP3 files, albeit with a tiny catch. The MP3 format uses sound compression technology which is patented. The owners of the patent have chosen to charge a sufficiently large royalty as to make including MP3 functionality within Graphic Workshop Professional well nigh impossible. Graphic Workshop Professional will play MP3 files by calling a third-party MP3 player application, assuming there's one installed in your system. This is a fairly seamless procedure – once you have a suitable MP3 player installed, you'll find that playing MP3 files works more or less like playing WAV files or MIDI files through Graphic Workshop's user interface. Any MP3 player that can play a file passed to it as a command line argument is suitable for use with Graphic Workshop. If you don't have one, you can download a free MP3 player – see http://www.mindworkshop.com/alchemy/mp3.html for a link. The holders of the patent for MP3 audio compression have specifically exempted the authors of freeware MP3 players from paying royalties. Because of the patent restrictions on MP3, Graphic Workshop Professional is unable to offer the functionality of converting to or from the MP3 format. This is a situation which is unlikely to change any time soon. You can find more about the licensing restrictions and royalty schedule for MP3 at http://www.iis.fhg.de/amm/legal/index.html#licensing. As of this writing, the patent holder says the following:
2.1.1. Free MPEG Layer-3 Software Decoders/Players for Personal Use
Graphic Workshop will display the video of MPEG animations. It will not convert MPEG to other formats, or other formats to MPEG. MPEG files display in Graphic Workshop's browser windows with a canned thumbnail. Graphic Workshop will play files in this format using the default Windows application associated with this file type. You will need to have an application capable of playing MPG files installed on your system, and associated with the MPG file type. This is typically Windows Media Player.
These are the image files used by the paint application which came with Microsoft Windows version 2. MSP files only support monochrome images.
PCD (Kodak Photo-CD) – Maximum bits: 24 Kodak Photo-CDs allow you to have conventional photographs converted to Kodak's proprietary CD-ROM format. The resulting files can be viewed, converted and treated like other PC file formats. Having your photographs made into Photo-CDs will avail you of very high grade scanning even if you don't own a scanner. Photo-CD image files usually reside in a directory named \PHOTO_CD\IMAGES on a Photo-CD. They're named by the following convention: IMGxxxx.PCD where xxxx is a four digit number, beginning with one for the first image. Each PCD file contains a number of scans of the same image at different resolutions. The very low resolution images are used for thumbnail previews. Medium-level images are useful to view and work with Photo-CD scans in a PC environment. You can tell Graphic Workshop to read Photo-CD images at a specific resolution through the Photo-CD Read Options item in Setup. If you choose one of the 256-colour options you'll see dithered images – these are useful if your display card only supports 256 colours. If you choose one of the RGB options, you may see coarse dithered images when you view a Photo-CD image, but you'll be able to convert PCD files to high quality true colour images for use with colour separation and desktop publishing software, photographic retouching packages, such as Photoshop. Choose one of the grey scale options if you will be outputting your Photo-CD images to a monochrome device, such as a laser printer. Note that if you choose a resolution which is not available on your Photo-CD, the next available resolution will be substituted. If you use Graphic Workshop to convert from PCD files to another format, you must enable the Prompt for Destination option in Setup. If you don't do this, Graphic Workshop will attempt to write its converted files to your CD-ROM drive, which would be a bit tricky, CD-ROMs being read-only. The thumbnails for PCD files are not handled like thumbnails for other file formats. Specifically, there are no THN files used – the images are actually the lowest-resolution scans in the PCD files in question. This means that you cannot use the Details and Search functions with PCD thumbnails. Graphic Workshop will convert other formats to PhotoCD PCD files, allowing you to create your own PhotoCDs. You can also create individual PCD files for other applications, of course. You'll need a CD-ROM writer to create a PhotoCD – Graphic Workshop just creates individual PCD files. Graphics written to the PCD format will be stored in one or more medium and high resolution fixed-size images, as well as range of smaller thumbnail images. You can choose the highest resolution size for the PCD files you create through the PhotoCD Write option in the Setup dialog. There are three maximum-resolution values for the PCD files created by Graphic Workshop:
If you select the base sixteen resolution as the maximum resolution for your PCD files, each PCD file created by Graphic Workshop will include a base sixteen-resolution image, a second image scaled to half its size for a base four image and a third image scaled to a quarter of the size of the original, for the base image. There will also be a range of smaller thumbnail images. If you select the base four resolution as the maximum resolution for your PCD files, each PCD file created by Graphic Workshop will include a base four-resolution image and a second image scaled to half its size for a base image. There will also be a range of smaller thumbnail images. If you select the base resolution as the maximum resolution for your PCD files, each PCD file created by Graphic Workshop will include a base-resolution image. There will also be a range of smaller thumbnail images. Images written to the PCD format will be converted internally to 24 bit graphics before they're written to PCD files. Because PCD files are designed to store high quality graphics rather than to store pictures in the smallest possible space, you'll find that they typically get very large. Converting from images with less than 24 bits of colour depth to the PCD format will almost certainly result in PCD files which are a lot larger than the files you converted from. If you convert a graphic which has image dimensions larger than the fixed dimensions of the maximum resolution you have selected in the PhotoCD Write item in the Setup dialog, your image will be cropped to fit. If you convert a graphic with smaller image dimensions, it will be centred in a grey field. In addition to the three fixed resolution options in the Photo CD Write option in the Setup dialog, you can also select Automatic. This option will choose the most appropriate maximum resolution for each image written to the PCD format.
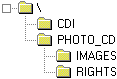
The PCD writer can require a lot of memory if you're working with base sixteen-resolution images – the raw image data for such an image requires eighteen megabytes, and multiple copies of it may reside in memory while it's being processed. If you encounter memory errors or image distortion, make sure you're running on a machine with at least 64 megabytes of memory and that no other applications are active. Web browsers are particularly memory-hungry as rule. The following illustrates the simplest directory structure of a PhotoCD. Some software which reads PCD files expects to find them in a tree structure like this one. The directory \PHOTO_CD\IMAGES is used to store all the PCD image files. They should be named IMG0001.PCD, IMG0002.PCD, IMG0003.PCD and so on to conform with the conventions for creating PhotoCDs.
See the Kodak web page at http://www.kodak.com for more about PhotoCDs.
PCT (Macintosh PICT) – Maximum bits: 24 Macintosh PICT files are roughly the equivalent of Windows metafiles. They're used on Macintosh systems to store both pictures and line art. Graphic Workshop will only read PICT files with pictures in them, and it will only read the first picture in PICT files containing multiple pictures. Most of the PICT files that find their way off Macintosh systems contain one picture per file, and are as such suitable for use with Graphic Workshop. If you encounter an error while reading a PICT file – most likely a message about there being no bitmap in the file in question – you've come across an unsuitable PICT file.
PCX is a very old image file standard – it originated with Z-Soft's PC Paintbrush software back in the late Jurassic period. It's widely supported as a graphic file format. PCX files can range from monochrome to 24-bit images. All the various formats are supported by Graphic Workshop. In writing PCX files, the horizontal and vertical resolution fields of the PCX header will be set to the file resolution value discussed in the section of this document dealing with TIFF files. This value is ignored by most PCX readers – if you don't know what it is, you can probably ignore it too.
These should not be confused with Lotus 1-2-3 PIC drawing files. PIC files are created by GLPaint/GLPro and are used by Grasp, among other things. At present, Graphic Workshop writes 24-bit images to the PIC format as type one high colour files, that is, with fifteen bits of colour information. In addition to reading PIC files from the GL Paint package, Graphic Workshop will also read PIC files generated by Pegasus software. The Pegasus PIC format is used by several commercial photofinishers who provide photographs on floppy disks. The Pegasus PIC/JPEG library is a product of Pegasus Imaging, and is available for a wide range of imaging applications. You can learn more about the Pegasus PIC/JPEG library and other imaging development tools by Pegasus at their web page, http://www.pegasustools.com.
The PNG, or "Portable Network Graphics," format was created as a successor to GIF. It features lossless compression for images with up to 24 bits of colour and most of the other features of GIF. In most cases it will provide at least slightly better compression than GIF. PNG files can be interlaced or non-interlaced. This won't affect how PNG images look in Graphic Workshop, but interlaced PNG files will cause Graphic Workshop to pause momentarily before its status bar begins to indicate that something's happening. The PNG Compression control in Setup defines how hard Graphic Workshop will try to compress PNG files. It can range between one and nine. If it's set to one, PNG files written with Graphic Workshop will not be all that well compressed, but they'll write quickly. If it's set to nine, Graphic Workshop will usually manage to create smaller PNG files, but it will take a lot longer to do so. Intermediate settings will represent a tradeoff between these two extremes. Note that this setting will not affect the quality of an image stored in a PNG file – it only deals with the compression effectiveness and the time it takes to write a PNG file. By default, Graphic Workshop will add a TEXT chunk to any PNG files it writes specifying the compression fact it has used. You can disable this feature by setting the PngAddCompFac item in GWSPRO.INI to zero Password protection of PNG files: Read this next bit carefully if you want to use the password protection feature of Graphic Workshop for Windows. If the Password Protect PNG item in Setup is enabled, you will be prompted for an encryption password every time Graphic Workshop writes a PNG file. This password will be used as a "seed" to encrypt the image data in the PNG file to be written. In order to view or otherwise read an encrypted PNG file, you will need its password. If you attempt to view an encrypted PNG file with Graphic Workshop, you will be prompted for the password. Graphic Workshop will not allow you to view the image unless you can enter the correct password for it. Note that these passwords are case sensitive. If you attempt to view an encrypted PNG file with another image viewer, you will see a scrambled image. Encrypted PNG files do not store their encryption keys – if you forget the password for a picture, there is no easy way to retrieve it. Please don't contact us about lost passwords – we have no way of retrieving them either. Having said this, someone with enough time and a bit of software could probably crack the passwords for encrypted PNG files. The encryption function is intended to provide a modest level of security for sensitive images. It's by no means unbreakable, and it would be inadvisable to use it in situations where absolute security is required. It makes a good parental lockout, especially if you're careful to remove all other PNG viewers from your hard drive. Note that while actual PNG files can be scrambled, their thumbnails cannot. If you really want to be sure no one can see what's in your encrypted pictures, remove their thumbnails. In addition, see the Configuration document for information about the Persistent Passwords option. A short editorial and pontification: Within the limits of common sense, decency and whatever laws prevail where you live, we feel that grown-ups should be able to look at pretty well anything they like. We also feel that responsible grown-ups should be able to keep their kids from viewing images which might be inappropriate for ankle-biters. As such, we've implemented this feature. Alchemy Mindworks does not condone the use of its software for the distribution of illegal material. Be warned – if the local law where you are catches you with encrypted PNG files that contain something nasty and they want information about cracking the encryption keys, we'll provide them with it. For those who are interested in this sort of thing, the encrypted PNG images have their data exclusive-OR'ed with the characters of the decryption keys, with every even numbered byte inverted. The password checksum is a long integer which contains the sum of the character values, plus one if the result is zero. This format supports alpha channels.
PSD/PDD (Adobe Photoshop) – Maximum bits: 24 The PSD format is native to Adobe Photoshop. It can store images having up to 24 bits of colour – it also allows for transparency and several other options which are not supported by Graphic Workshop. PSD files can be stored either uncompressed or compressed using run-length compression. The latter is typically not very effective on photorealistic subjects. Enable Compress IFF/LBM/PSD Files in Setup to have Graphic Workshop write compressed PSD files. PSD files also appear with the extension PDD in some Adobe applications.
PSP is the native format of "Paint Shop Pro," a shareware paint program. Some PSP files contain multiple "layers" – effectively multiple images which are intended to be displayed as a single picture. Graphic Workshop treats these as distinct images. Because the transparency and positioning information which allows them to be combined is ignored, the results of viewing these distinct graphics may look markedly different from the original.
The RLE format is actually a variation on the BMP format discussed previously. It uses rudimentary image compression. Graphic Workshop for Windows will read most RLE files from other sources. One known exception is the VGALOGO.RLE file provided with Windows 3.1.
The SCR format supports Windows screen savers. Graphic Workshop will create Windows screen savers from your graphics – see the Reference document for more about this. If you'd like to create complex distributable multimedia screen savers, see Alchemy Mindwork's Screen Saver Construction Set application..
The SFW format is used for disk-based photographs processed by Seattle Film Works. Graphic Workshop will read SFW files and convert them to other formats, but it will not convert images to SFW files. Support for SFW files is provided by a downloadable plugin. Please see the plugin web page for more about this plugin.
SGI (Silicon Graphics) – Maximum bits: 24 The SGI format is use by Silicon Graphics workstations. Graphic Workshop supports most of the format. Specifically, it does not recognize SGI files with obsolete line formats. All graphics written to the SGI format will be stored as uncompressed 24-bit files, no matter what their source colour depth was. Graphic Workshop also recognizes files with the extension RGB as being SGI files.
RAS (Sun raster) – Maximum bits: 24 Sun raster files are native to the Sun unix environment. They can be uncompressed or run-length compressed. There are also a number of obscure compression standards which Graphic Workshop does not support at present. These rarely turn up – the Get Info function will tell you if you've encountered one. Sun raster files appear with a variety of file extensions. Graphic Workshop uses the extension RAS. You might have to rename your files to use this extension if they're named something else. Extensions for Sun raster files on a unix system can include .ras, .rast, .im1, .im8, .im24 and .im32. Note that some 24-bit Sun raster files were created with their red and blue colour values erroneously interchanged.
The Truevision Targa format is used by several high-end paint programs and things like ray-tracing packages. Targa files can also store true colour images with sixteen bits of colour, rather than 24, to save space. Enable the Create 16-bit Targa switch in Setup to have it do this. This format supports alpha channels. Note that graphics with alpha channel information written to the TGA format will be written as 24-bit files, ignoring the setting of the Create 16-bit Targa switch.
The TIFF facilities of Graphic Workshop can get a bit involved. The TIFF format offers lots of options to make it applicable to a wide variety of applications – which entails a certain amount of confusion, as well. Note that due to the wide variations among the programs which produce TIFF files, Graphic Workshop would be lying rather badly if it claimed to be able to read all TIFF files. Setup includes a field for TIFF Write Options, which allows you to define the type of compression to be used in creating TIFF files. Each line in this field has three items, specifying the compression type for monochrome files, palette colour files with up to eight bits of colour and true colour 24-bit files respectively. The options are:
TIFF files with no compression are fast to read and write, and are all but certain to be accepted by any application that reads TIFF files. However, they can result in huge disk files. TIFF files with LZW compression take somewhat longer to read and write, but they usually result in smaller files. There are many applications which read TIFF files but which do not support LZW compression. PackBits compression is somewhere in the middle. Group 4 FAX compression can deal with some line drawings more effectively than LZW compression can, but it creates files that almost no TIFF readers will handle. Don't use Group 4 unless you're certain your target application will read them. JPEG compression is identical to the compression used by the JPG file format – it discards a specified amount of image detail to achieve more effective compression. The amount of detail to be discarded can be set using the JPEG/FIF/ART Quality control in Setup. PNG compression uses the same compression as is found in the PNG format, the PKZIP Deflate compression. Note that while they are legal TIFF compression types, JPEG- and PNG-compressed TIFF files are supported by very few other applications as of this writing. You can change the default style of the TIFF details by editing GWSPRO.INI and setting the TiffAlternateDetails item to one. This alternate style is useful if you want to better understand the structure of a TIFF file. Image resolution: TIFF files created by Graphic Workshop carry XResolution and YResolution tags. These tags are interpreted by some applications as indicating the absolute size of the image in a TIFF file. By default this value is 300, that is, 300 dots per inch. You can change this by setting the File Resolution field in Setup. It's important to keep in mind that the resolution value stored in an image file is an arbitrary number which tells software that reads the file in question at what resolution you'd like it displayed or printed at. The resolution value does not affect the actual image contexts. Graphic Workshop supports multiple-image TIFF files – if you attempt to read one, a dialog will appear prompting you to select the image you're interested in working with. It supports TIFF 6.0 multiple-image TIFF documents, as used by some Microsoft imaging products. By default, Graphic Workshop Professional writes TIFF files with their image data stored as RGB pixels. Some commercial printers insist on having TIFF files with their pixels stored as CMYK pixels. If you don't know what RGB and CMYK pixels are, you can ignore this issue. You can configure Graphic Workshop to create CMYK TIFF files by choosing one of the CMYK selections of the TIFF Write Options combo box in Setup. Keep in mind that CMYK TIFF files are not supported by most applications that read the TIFF format – unless you need them for a commercial printing application, you should leave this option alone. In additional, all other things being eqaul, CMYK TIFF files will be about 25 percent larger than identical images stored in RGB TIFF files. This format supports alpha channels. Alpha channel information will not be included in your TIFF file if you select a CMYK write option.
TTF (TrueType fonts) – Maximum bits: 1 TTF files are TrueType fonts. Graphic Workshop will display these as font samples. If you convert from TTF to another format, you'll have a bitmapped image with a sample of the font. The size of the bitmaps, the example text and other features of the font samples can be configured – see the Configuration document. Graphic Workshop will not create TTF files. For a comprehensive TrueType font management package, check out Alchemy Mindworks' Font Wrangler.
TXT (text files) – Maximum bits: 24 Graphic Workshop will create a two-colour image from any ASCII text file. It can contain both alphabetic characters and high order IBM block graphic characters. Tabs are expanded and all other control characters except for carriage returns are ignored. Source text files for this function can have up to 2048 lines of text. A line can be up to 4096 characters wide. If you use files which are longer than this, the extra text will be ignored. Note that a text file of these dimensions will create a 130-megabyte bitmap. Suitable text files must be in pure ASCII, not proprietary word processor documents. They must have the extension TXT. By default, if you convert a bitmapped image file to the TXT format, an ASCII graphic of the image will be created. This is a text file in which the brightness levels of the original image will be represented by characters. If you print an ASCII graphic and hold it a few feet from your face, it will resemble the original bitmap it came from – sort of. There are several elements in the GWSPRO.INI file that can be used to fine-tune the way ASCII graphics appear. See the Configuration document for more about these. Note that if you convert a 640 by 480 pixel graphic to TXT, you'll wind up with a text file that's 640 columns across by eight pages deep. You might want to work with fairly small source images. Also, keep in mind that you will experience some loss of image quality when you convert a bitmapped graphic to an ASCII graphic. When you print ASCII graphics, you must use a monospaced font, such as Courier. Very small point sizes will usually look better, especially if you'll be working with fairly wide graphics. Note that as long as you're attempting to read files, you can treat text files just like other monochrome graphic files from within Graphic Workshop. As such, you can view them, convert from TXT and so on.
UUE (uuencoded Internet graphics) The UUE format isn't a graphic file format at all. Rather, it's a way of graphics and other binary objects so they can be sent over text-only electronic mail systems, such as Internet e-mail and Usenet newsgroups. The process of uuencoding a graphic turns it into text – albeit fairly mysterious-looking text – which can be mailed. The received uuencoded file must be uudecoded to return it to its former state. If this means almost nothing to you, you're probably not involved with this aspect of the Internet and you can safely ignore this section. Graphic Workshop will read the images from uuencoded text. The file extension for your uuencoded text must be UUE. The text itself can contain multiple sections if you like – Graphic Workshop will attempt to figure out where the breaks are and assemble the original graphic into a correct file. Graphic Workshop's UUE decoder can work in strict or relaxed mode, as defined by the Relaxed UUE option in Setup. This has to do with how it deals with UUE files having multiple sections. In strict mode, the standard begin <mode> <filename> fields must precede the first uuencoded block in your source text file. Each subsequent section for multiple-section uuencoded files must start with a BEGIN line of some sort and end with an END line. A uuencoded graphic that appears as multiple sections must have all the sections concatenated into a single UUE file. Note that Graphic Workshop does very little validity checking for uuencoded data – damaged source data, sections out of sequence or incorrectly formed uuencoded headers or trailers may cause Graphic Workshop's uudecoder to create an incorrect final binary file and hence a mangled or unreadable graphic. In relaxed mode, Graphic Workshop will decode any line which checks out as valid uuencoded data, ignoring all the BEGIN and END markers save for the first one. If it doesn't find the END marker of the current file being decoded, it will prompt you for the next file in the current sequence. The strict mode guarantees you a correct decode if your UUE files have the correct section markers, but not all uuencoded data has these. The relaxed mode can usually handle files without headers properly, but some pathological cases will crop up in which spurious data is decoded. The strict mode does not prompt for multiple-sections of a UUE file. Keep in mind when you're using the uudecoder in Graphic Workshop that whereas human beings can easily distinguish between the header and other flotsam which often appears before and after uuencoded graphics in e-mail, software is much less adept at this sort of thing. If you encounter uuencoded files that won't read, look at them with a text editor to see if there's something obviously peculiar about them. Should one of your images appear incomplete or obviously damaged, your UUE source file probably hasn't been created to the above specification – and perhaps the relaxed mode of the decoder can't quite figure out what's happening to it. In this case, you'll have to open it with a text editor and do a bit of hand massaging between the section breaks. Specifically, just delete all the intermediate text and leave the uuencoded data as one long block. Note that when it decodes a UUE file, Graphic Workshop will ascertain the file type for the internal file name stored in the begin header of the first section, but it will form the body of the destination file name for translation or other processes from the body of the UUE file name. You can treat UUE files like any other graphic file format so long as they contain graphics in a format that Graphic Workshop recognizes. For example, you can convert from UUE to a conventional bitmap format. About multiple-section UUE files: If you download uuencoded files from newsgroups, you'll probably encounter some postings with section numbers, written as [1/3], [2/3], [3/3] and so on. This designation indicates that the original uuencoded graphic was too large to fit in a single Usenet posting, and has been split up among several consecutive postings. To view these files with Graphic Workshop, you can do one of several things:
In most cases you'll want to use the first approach discussed here.
WAV files aren't graphics – they're short sound bites. None the less, you can browse them with Graphic Workshop. If you "view" one, a small bitmap will appear and the sound in the file will play. Note that the Play item in the Picture menu of View mode can be used to repeat a WAV file once it finishes. If you attempt to convert a WAV file to a graphic format, the resulting graphic file will contain a copy of the WAV bitmap that appears in View mode. You can convert animation and digital video formats which support sound, such as AVI and MOV, to the WAV format. The resulting WAV file will contain the sound track for the converted movie. You cannot convert other graphic formats to WAV. WAV files display in Graphic Workshop's browser windows with a canned thumbnail. You must have the MCI sound drivers installed for the WAV functions to work properly. These are typically installed as part of Windows 95, 98, 2000 and NT 4.0. If the WAV functions don't work, you have driver problems. Graphic Workshop can play files in this format using either the default Windows application associated with this file type, or through its internal player. See the Display tab of the Setup dialog for more information.
WBMP (WAP Bitmap) – Maximum bits: 1 The WBMP format is used by WAP devices – WAP is Wireless Application Protocol. WAP devices are high-end cellular telephones and wireless gadgets that display graphics and other formatted content. See the WAP Forum for more about WAP devices. Graphic Workshop can only read and write type zero WBMP files – this is the only type defined as of this writing. As WBMP files can only display two colours, you'll want to use the Dither function of Graphic Workshop to convert images with more colour depth to WBMP. The WBMP format stores its image data uncompressed.
Windows Wallpaper – Maximum bits: 24 If you select the Wlppr item from the Destination dialog, your selected file will be converted to the BMP format and written to your \WINDOWS directory. It will appear on your desktop as wallpaper. Converting multiple files to Wlppr will cause all the files to be written to your \WINDOWS directory, but only the last one will become your current wallpaper image. You can change the wallpaper image for your desktop through the Windows Control Panel. Note that 24-bit wallpaper ties up a lot of memory and it won't look very good on systems with 16- or 256-colour screen drivers. Consider reducing 24-bit images to 256 colours with the Effects function before you use them as wallpaper. When you convert an image to wallpaper, you will be prompted to display it centered or tiled.
The WMF format contains vector graphics. Graphic Workshop will rasterize WMF files into bitmaps. You can set the colour depth and approximate image dimensions of the rasterized bitmaps this feature will create using the Vector Read Options control in Setup. Graphic Workshop will not write to the WMF format. When you read a WMF file with Graphic Workshop, the result will be a bitmap. Graphic Workshop will read both conventional and placeable metafiles. If you're curious, you can tell which is which through the Get Info function. The Comments field will define the number of objects in the file for a conventional metafile and will say "Placeable metafile" otherwise. Note that because the aspect ratio of conventional and placeable metafiles are calculated differently, the same drawing stored in both forms will have slightly differing dimensions.
The WPG format is the native import graphic format for WordPerfect. These files can contain both bitmaps and line art, or vector graphics. Graphic Workshop can only deal with the bitmapped parts of them. If you view, print or convert a WPG file containing both bitmapped and vector elements, the vector elements will be discarded.
Graphic Workshop will deal with WPG files having one, four or eight bits of colour information, that is, monochrome files, sixteen-colour files and 256-colour files.
The XBM format is used to store small bitmaps – it's actually a C-language definition of a bitmap. XBM files are associated with unix systems, wherein they often store icons.
In addition to the file formats Graphic Workshop supports internally, it can also accept format plugins from third party developers. A plugin allows Graphic Workshop to read and write formats that it wasn't actually designed to support. Note that Graphic Workshop's plugin format is unique to Graphic Workshop. Plugins from other applications will not work with Graphic Workshop. You can see which plugins, if any, are installed for your copy of Graphic Workshop by opening its Setup dialog and clicking on the Files tab. The installed plugins will be listed in the Plugin Configuration combo box. If this combo box is disabled or empty, no plugins are installed. Please visit the Graphic Workshop Professional plugin web page for a complete list of the plugins available for Graphic Workshop. Some plugins for Graphic Workshop are written and provided by third-party developers, and we have no control over how well they work, or what if anything they cost to use. Having registered Graphic Workshop, you still may be required to pay to use third-party plugins. If you're a developer and would like to create a format plugin for Graphic Workshop, please contact usfor more information and a plugin SDK.
This document and all the other documentation included with Graphic Workshop Professional is copyright © 1995 – 2003 Alchemy Mindworks. It may not be reproduced in whole or in part or transmitted in any form save as a component part of the Graphic Workshop Professional software without the explicit written permission of the copyright holder. Unauthorized use of this document or any portion thereof may result in severe criminal and civil penalties. Alchemy Mindworks accepts no responsibility for any loss, damage or expense caused by your use of the information in this document, however it occurs. This product is marketed under license from Alchemy Mindworks Corporation.
|
|